Following on from my looking at the UTube references provided by my tutor and others I have been reading Maslen and Southern’s book “Drawing Projects: an exploration of the language of drawing” and doing a simple course on techniques for better drawing. In the course I have learnt more about hatching and crosshatching, composition line, blocking, contour line, structural drawing, value and form. I have spent lots of time practicing (I am in Indonesia and my partner is working sometimes in another part of Java)drawing trying to come to terms particularly with shading and types of mark making. I have looked at drawings by different artists in the Maslen and Southern book and online resources and drawing magazines and tried to practice these different approaches to understand better the drawing techniques used.
I then read further the first ‘Text’ section of the Maslen and Southern’s book concerning Drawing, Drawings, Concepts and Precepts, Making Drawings, Marks and mark making, Lines and edges, Tone and light, Negative space, being selective, Sketchbooks and Doodles. I have selected those parts of the book that resonated with me and for me to review as I am working through the rest of the course.
The authors comment (p.11) that most adults drawing skills have not developed beyond those of adolescents who gave up drawing! They talk about our whole personality being involved in the making of analytic and aesthetic decisions and our personal preferences that form the basis for work that should always be an expression of our individuality. The authors go on to stress that following one’s feelings and the use of intuitive judgement are essential in the organic development of drawing. Information is taken in by the eyes and other senses, considered and restructured in the language and materials of the activity of drawing. We are given the opportunity to examine the forms structure, spaces and surfaces in our world and gain a greater understanding to them. We can then express our own personal point of view.
“This examination of appearances, through the drawing process, forms the backbone to all the traditionally valued activities of the artist, and is the essential base upon which all visual art is formed”(Maslen and Southern, p14). You draw with feeling or spontaneous thoughts. A drawing can be viewed as an act of theatre. So it is essential to drawing that one learns to see and that continues with each drawing. I like the thought that drawing can be viewed as the process of seeing made visible.
Maslen and Southern comment that our drawing language skills increase with arctic as we extend our vocabulary of marks, materials and approaches.
‘I merely draw what I see.
I draw what, I feel in my body’ Barbara Hepworth
I found it interesting in the book when the authors say that “the drawing is as much about the artist as it is about what is being drawn, and it may on occasions tell you more about the artists’ state of mind, level of understand, etc than it does about the subject matter”(p.20). The comment made me really think much more deeply about what is drawing.
The section in the book on ‘Marks and mark-making’ resonated with me too:
‘Drawing is the simplest way of establishing a picture vocabulary because it is an instant, personal declaration of what is important and what is not’ Betty Goodwin quoted on p.28
Marks can be viewed as the form of words, the elements and how the drawing is made. Everyone makes their own unique set of marks and every medium has its own particular quality of mark. Similar to handwriting. For good mark making one needs to think about:
- is the mark the right one for the job
- ‘alive and express the ‘life energy’ of the artist
- communicate the qualities of light and the form, volume and surface of the subject of the drawing
- show changes in pace and rhythm that add interest and variety
- think about medium as different medium helps to determine the sort of marks to make
- size of mark to be made e.g. for a smaller drawing, or a larger drawing
For me to think about is the rigidity of my drawing or too little control. To change the way I hold the drawing instrument has provided a new and interesting choice in the language of drawing. To know what are the right marks to make is fundamental to learning how to draw. This relates to ‘feeling the mark’ as it is made on the paper e.g. lighter, darker, bold, curved. So practice, practice, practice drawing so that the skills of looking, feeling, discerning and responding in marks can be made in one action – my drawing instrument is an extension of my brain, heart, eyes, arm and hand. This makes me feel challenged, excited and vulnerable!!
I really feel that I want to keep drawing and try to improve greatly. I have also started the Projects in Maslen and Southern and find them really helpful.
However, I have to return to my coursework and Part 2 of the Assignment but will continue to do Maslen and Southern projects and any other opportunities to undertake drawing classes.


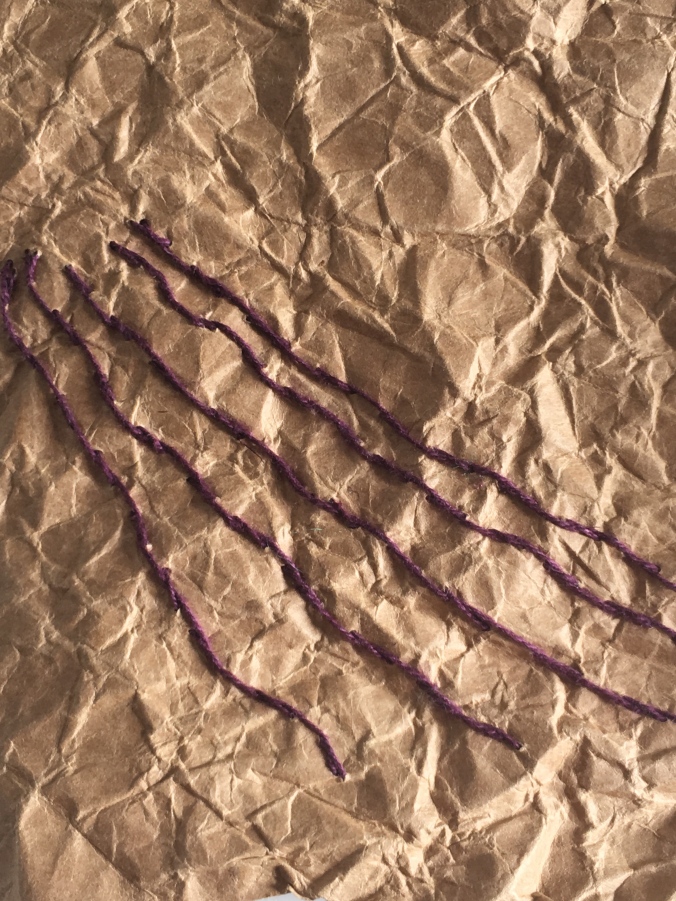 2. I also worked on another piece of crumbed brown paper with a seeding type stitch see below. But I then challenged myself did this really represent the drawing and I decided that it did not. I used a paper thread in two sizes for this stitching.
 3. Next I took a sample of the pierced paper and looking at my gelliprint of the eucalyptus leaves which have printed with straight lines I started to stitch with a thick thread but the paper rebelled and I could not pull the chenille needle through. I switched to a finer thread and this worked fine. I wanted to give a hint of the shape of the leaf with texture added by the piercing.
 4. I looked at my drawing of the seed pods and I decided to take one of the rubbed fragile Japanese silk type paper that I had dyed with coffee to draw more attention to the rubbed holes. I use the holes to depict the hollows in a section of my drawing of the long seed pod and then stitched in between to represent the top part or bridge between the hollows. I took two photos one taken on the surface and the other I held up so you could see the light behind the paper. Because the paper was so fragile I had to use a fine thread so as not to break the paper.

 6. Next sample I looked at my drawing of the folds in the Christening robe and decided to use one of the folded paper manipulations because it represented the folds. I doubled the thickness of my available thread and stitched in the depth of the folds on the paper. I chose to do a curved stitch and long to give more interest.
 7. I looked at my drawing of the large closed seed pod and thought of the crumbled folded paper I had made using the local newspaper I decided it might lend itself with the curved folds I had made to this seed pod. I decided to combine a paper thread and a rayon thread together and see what happened. I was surprised that the newspaper was so robust and dealt with the two threads and the chenille needle perfectly – no tearing.


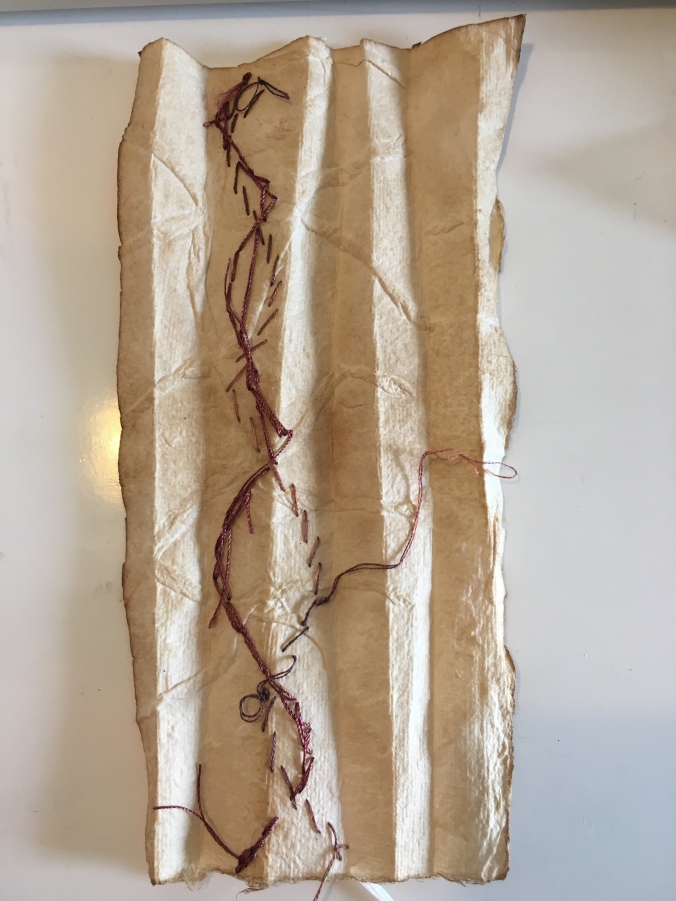
 10. I had a piece of white handmade textured paper from an Indonesian shop which I decided to fold and then dye in coffee to give it some more interest and to play on the swirly texture indented into the paper so I decided to use it to feature on small section of the swirly curvy indian ink drawing I had done with a stick depicting the flower on the christening dress. I chose the white thick paper thread and decided to couch it down with thin cotton thread. I chose shiny rayon thread doubled to do a secondary thinner line of curves. After I had finished I turned the piece over and thought the back looked interesting so I have photographed both the front and the back.
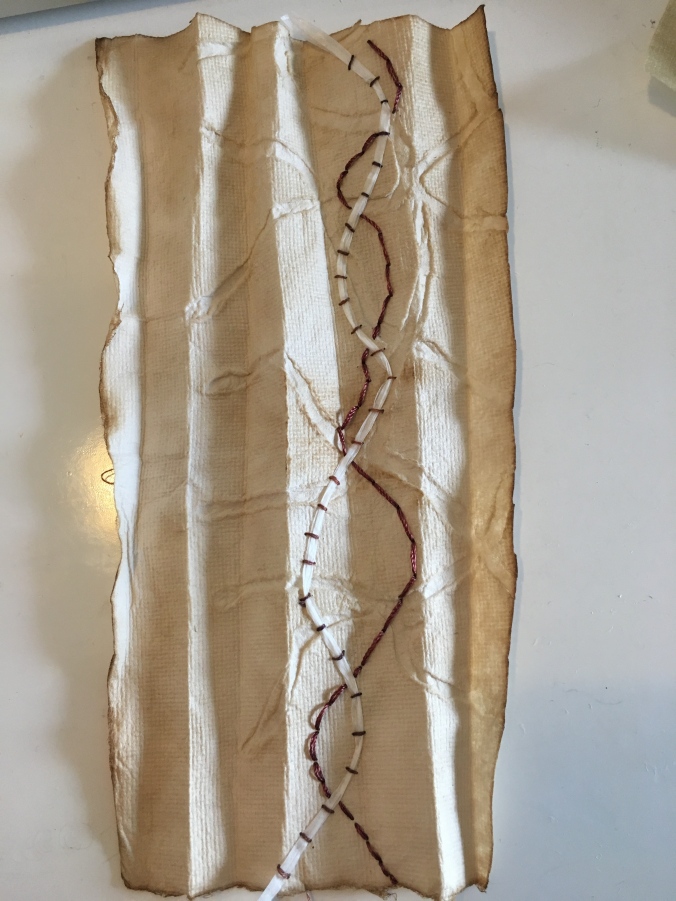
 I found making the samples a challenge at the beginning how could I marry the drawing, paper and stitch but as I set about doing I found it really interesting. The qualities of the paper as manipulated was good to set off stitching and really thinking about how drawing so informs the sample work overall. So the more interesting and formed the drawing the better.
 Thin Japanese rice type paper
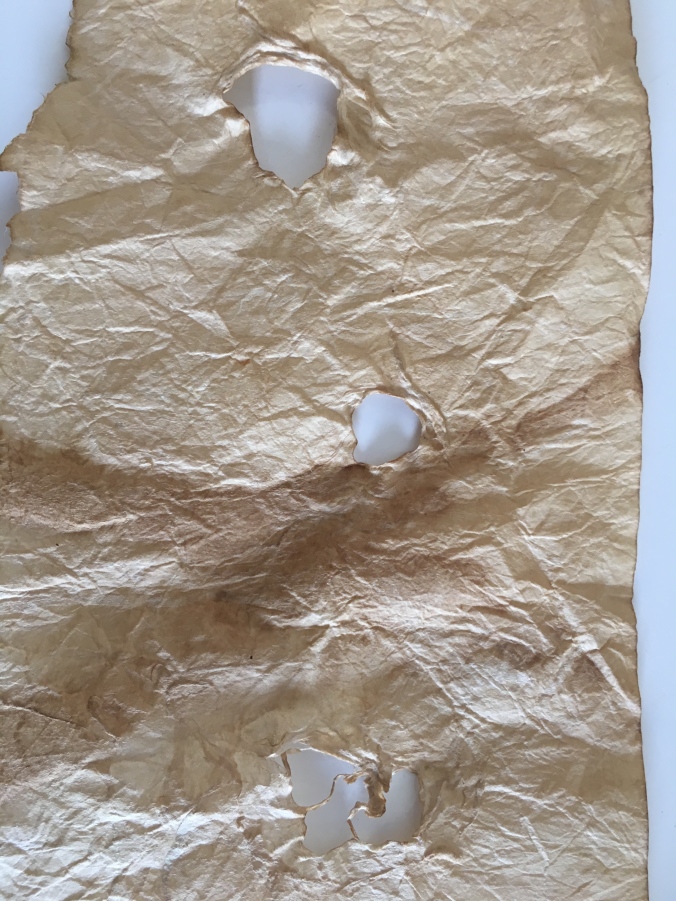 Thicker paper – handmade
 Handmade paper and I found the back of the paper worked best with the texture showing like drawn lines.
 This is a type of abaca warna paper from Indonesia – it made good fine straight lines.
 This is a really floaty type Indonesian paper but stronger than tissue paper – the marks made with the knife are wider and less uniform like some of my drawings. My piercing was inspired by examining my gelliprinting of the grevillia leaves which are very thin and spiky. The second drawing I selected was a close up stitching on the kantha purse which is also based on straight sort of lines.
 The next paper I used was tissue paper which was very soft and facile. I pleated with an emphasis on putting pressure at one end of the folding to attempt to get the folds to flow.
 For the third piece I decided to crumple and fold and found a reference in Inger’s work to Paul Jackson and his book Folding Techniques for Designers. I followed technique but Jackson suggested using a 50gsm paper I did not have that weight in my collection so I decided to use a piece of newspaper which proved really satisfactory.


